Visual tutorial on how to use the Citation Wizard
Learn about:
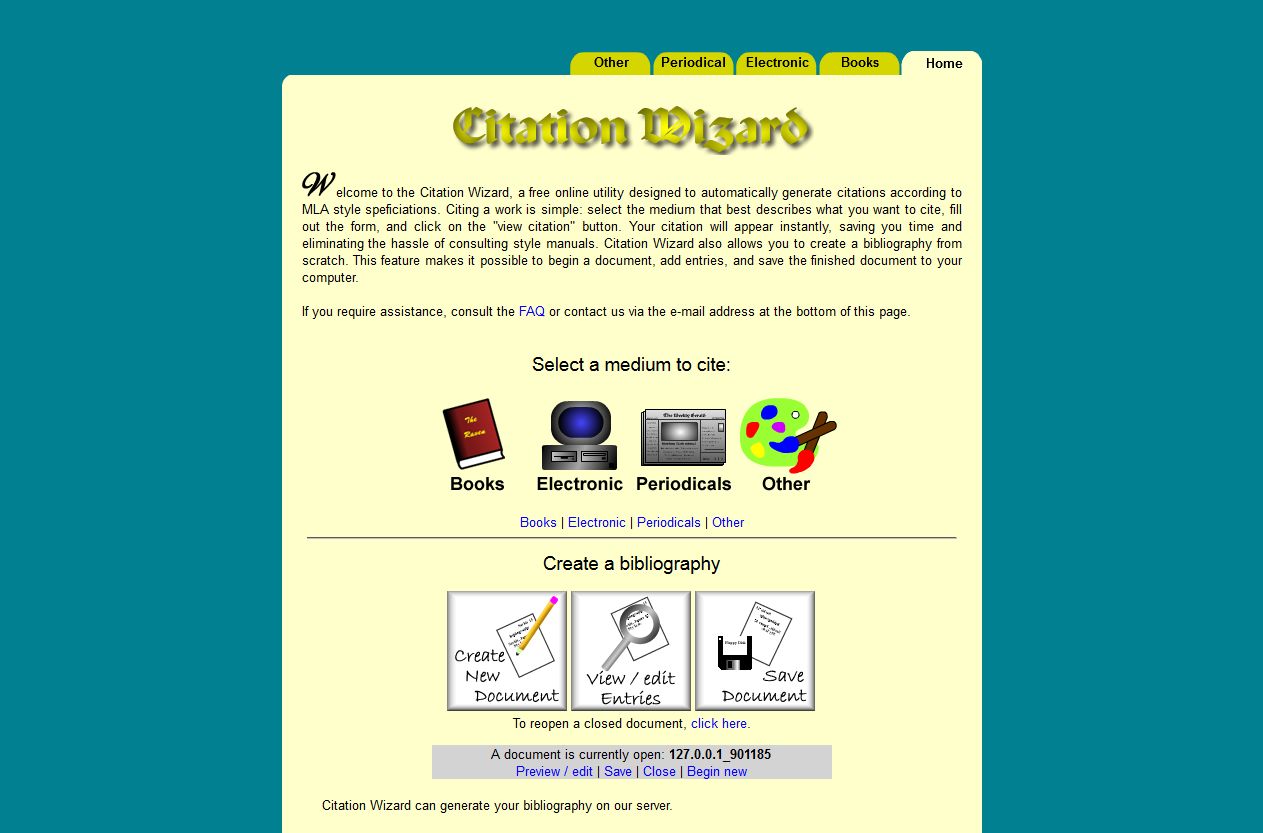
Step 1: Creating a citation is very easy with the Citation Wizard. To begin, choose from one of the four general mediums on the home page (or the tabs at the top of any page) for the work you want to cite.
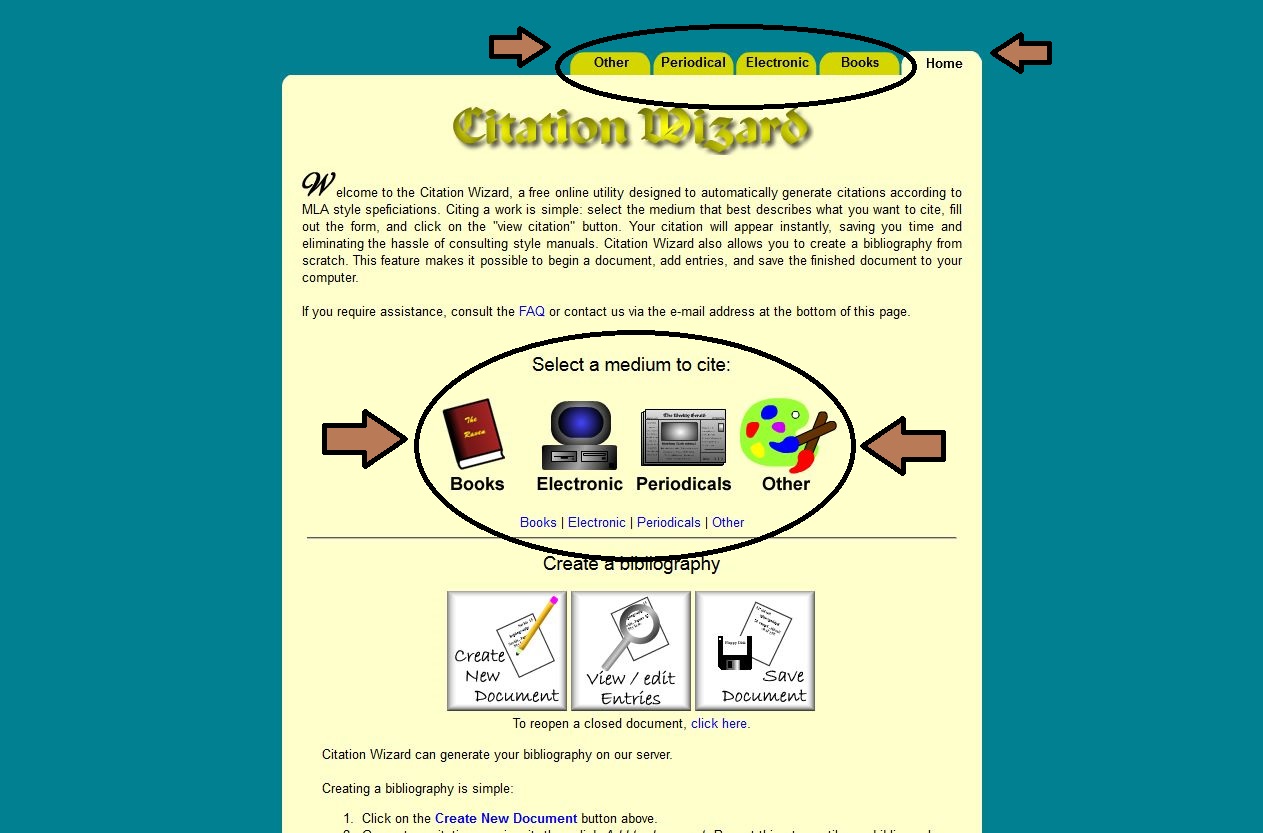
Step 2: Next, select the specific medium that best describes the work you want to cite.

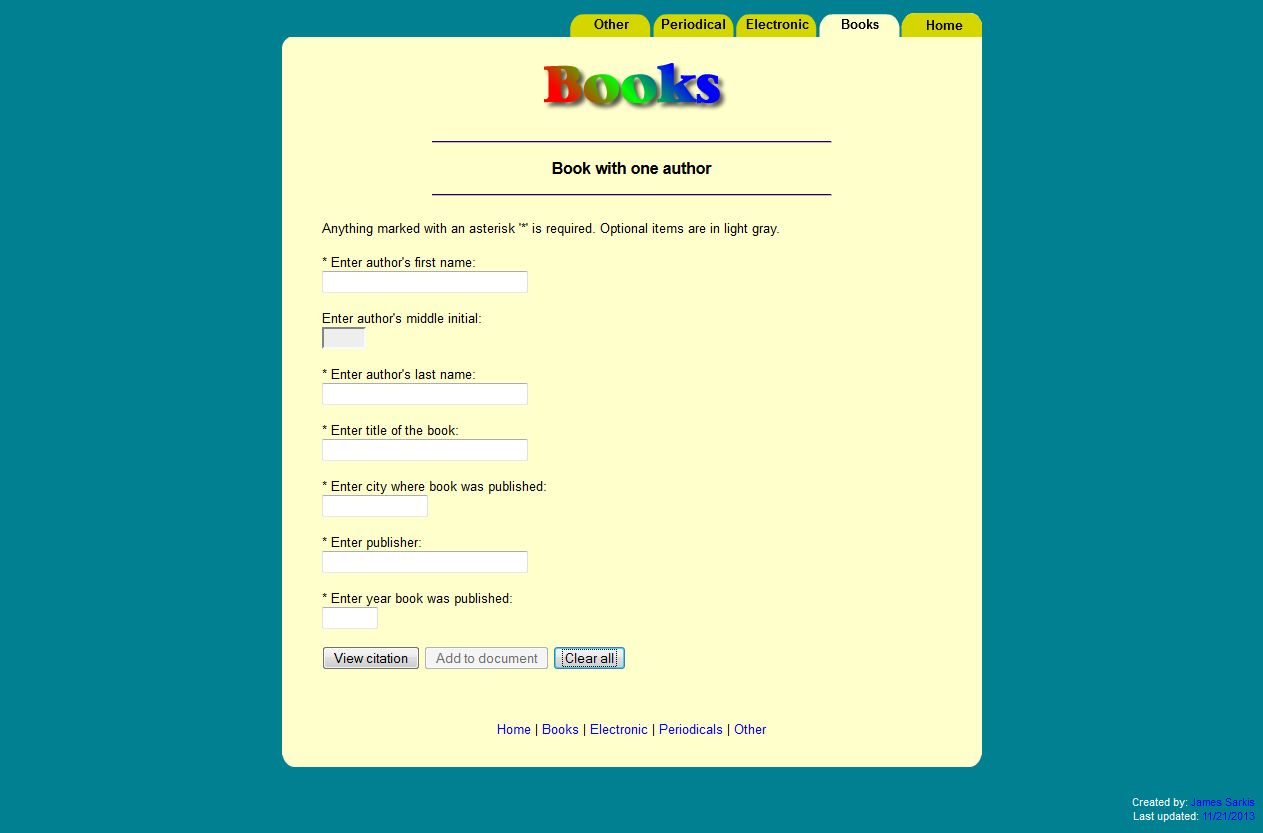
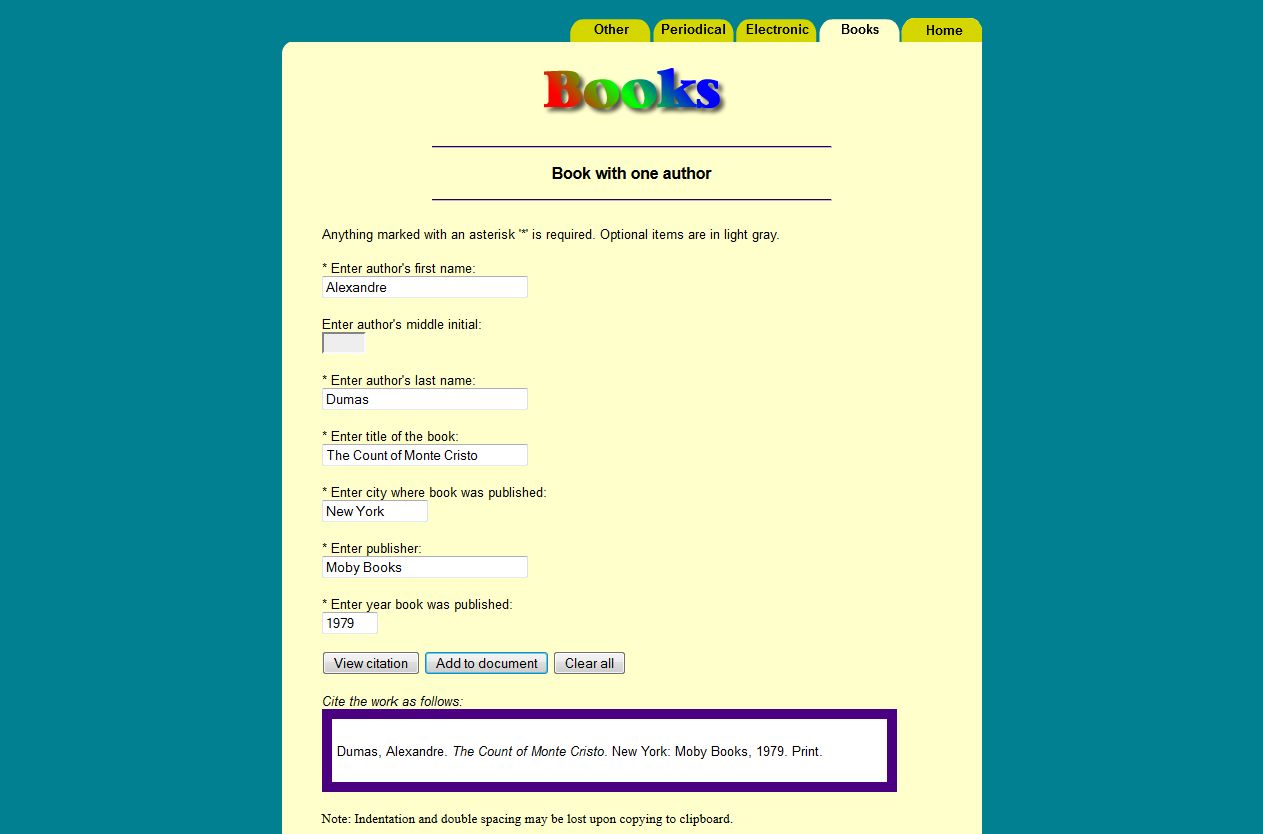
You will see a form like the one below. Each type of medium will have its own unique form.
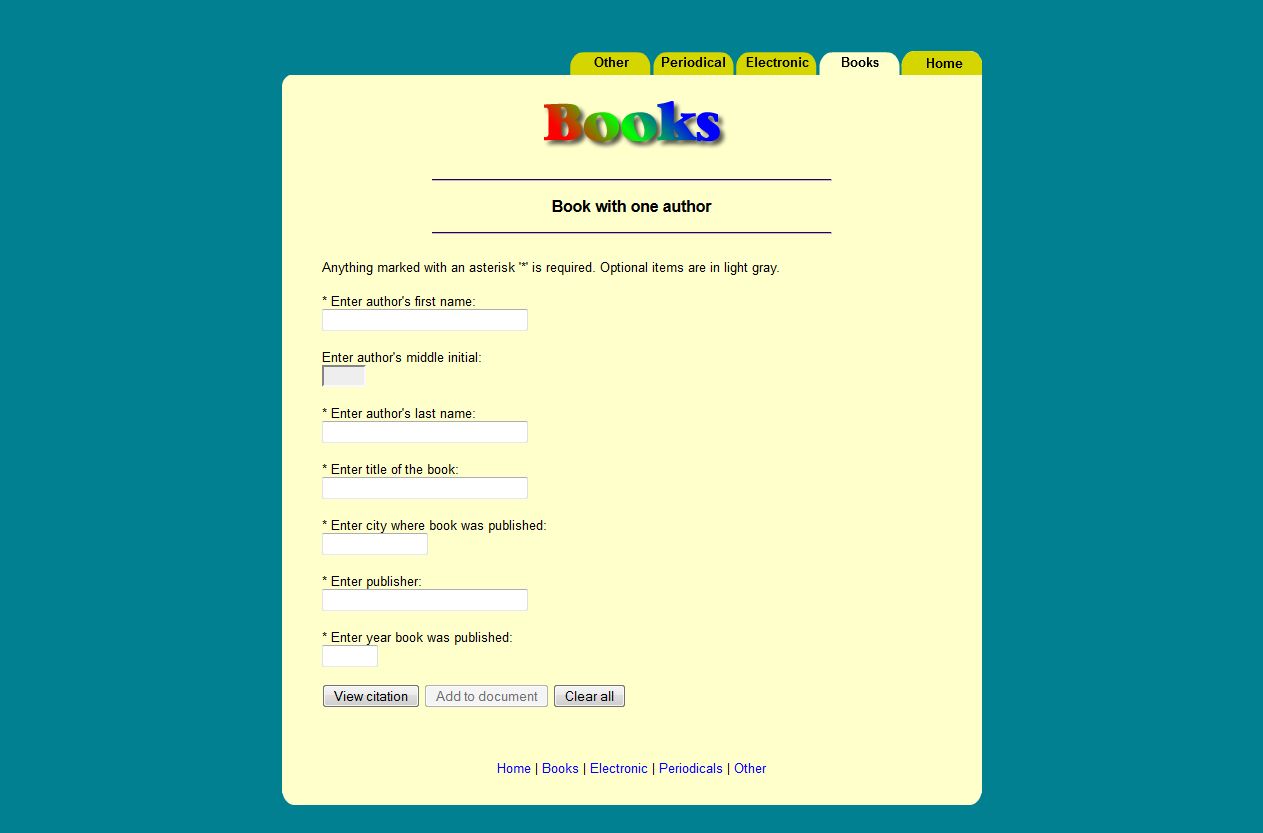
Step 3: Fill out the form as best you can. All white fields marked with an asterisk are required and must be filled out before the Wizard will generate a citation, otherwise an error will appear. Optional fields are in gray and may be left blank.
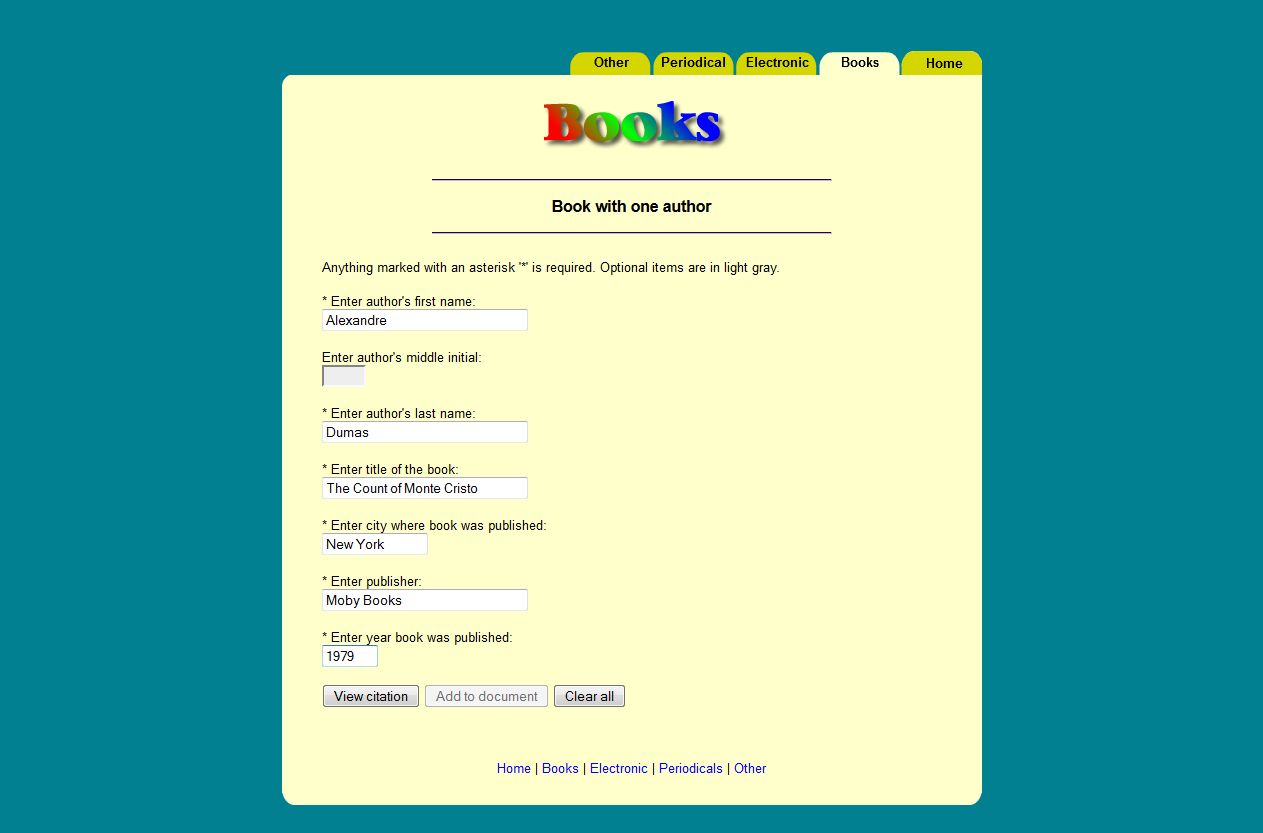
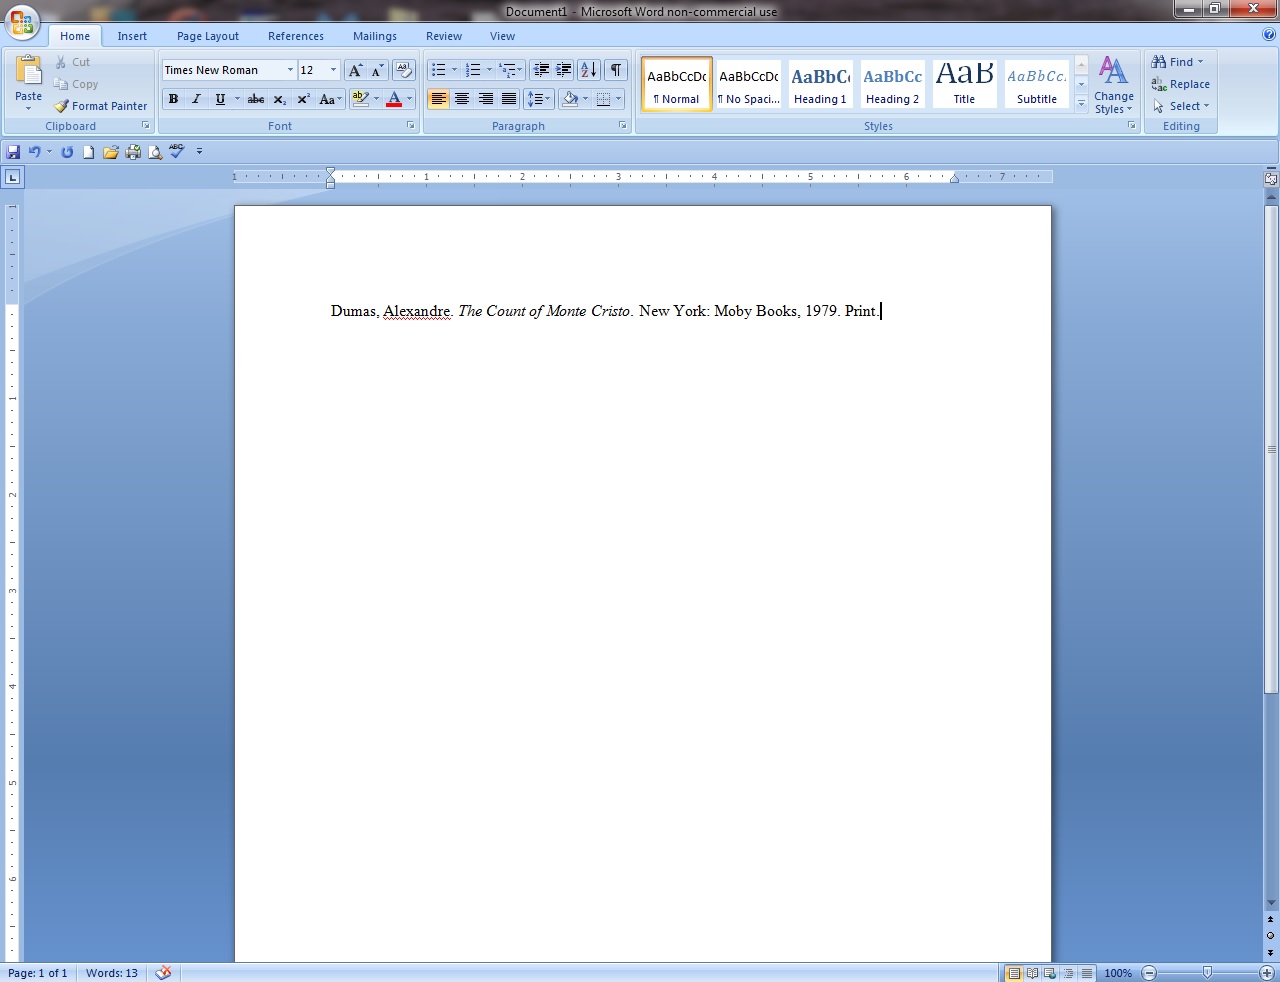
Step 4: Click on the View citation button when you have finished filling out the form. Your MLA citation will appear in a purple and white box below the form. To copy your citation into a word processor, highlight the text, right click and select Copy (on Windows) or choose Edit > Copy in your browser.

Step 5: Now open up your favorite word processor and paste the citation into your document.
If you want to cite another work of the same medium, you may click on the Clear all button to reset the form.
Repeat these steps for each citation. To make this process even easier, Citation Wizard is capable of producing a works cited or bibliography document for you on our server -- eliminating the need to copy, paste, and sort alphabetically. Read on if you're interested in this feature.
Did you know that it's possible to have Citation Wizard create your entire bibliography or works cited document for you? It is! Citation Wizard will build your document on our server, and take care of all the formatting and sorting for you. When you're done, you can save the finished document to your computer and print it from your favorite word processor.
To begin, click on the Create New Document button on the home page.

The document creation page will appear as seen below:
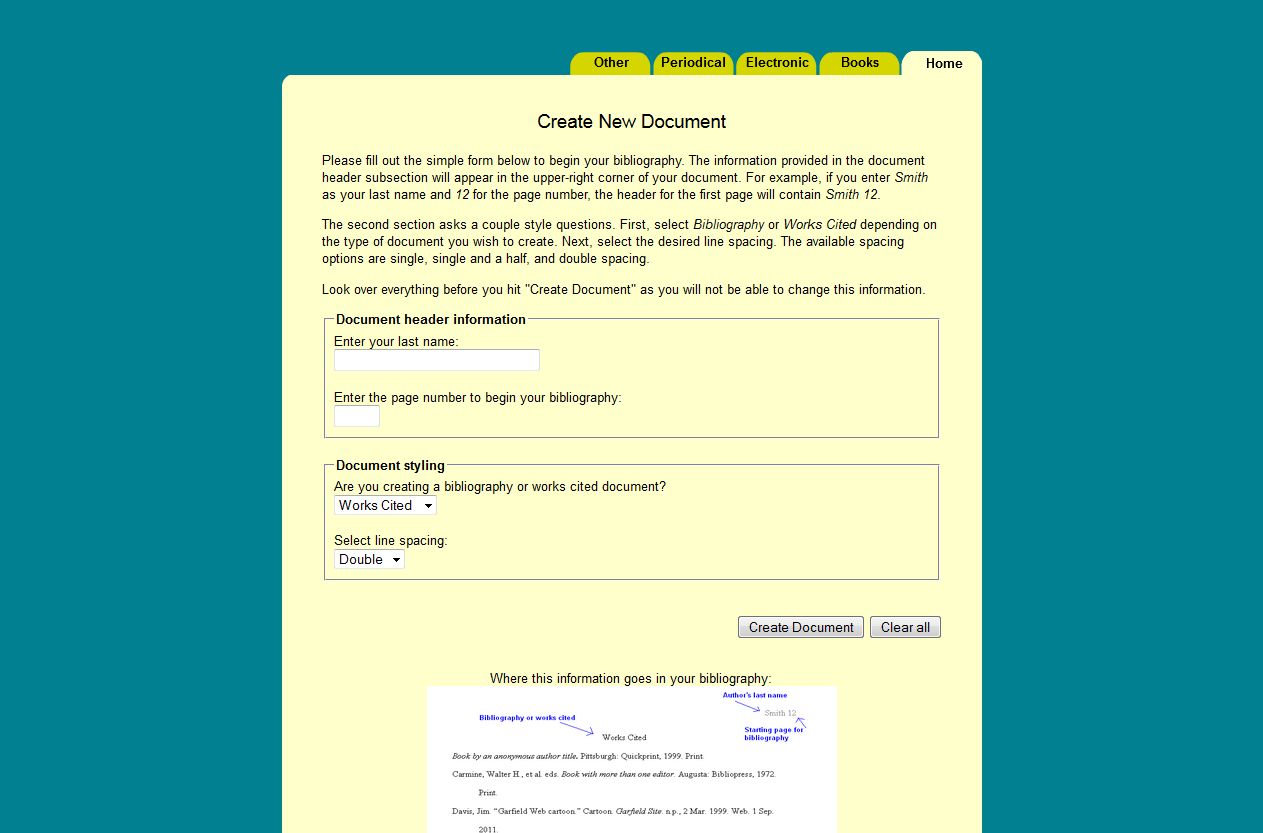
Fill out the simple form with your last name and the starting page number for your bibliography or works cited page. These values will appear in the upper-right corner of your document. Next, choose whether you are creating a "Bibliography" or "Works cited" document. This will set what word(s) to display at the start of your document. Finally, set the line spacing to either single, 1.5, or double space.

Click on Create document when you've finished filling out the form. You will see an acknowledgement that your document has been created and is open. We strongly recommend that you write down the document name so that you may return to edit your document at a later date should your browser's cookies be cleared. Documents are generally stored on our server for 3 months.
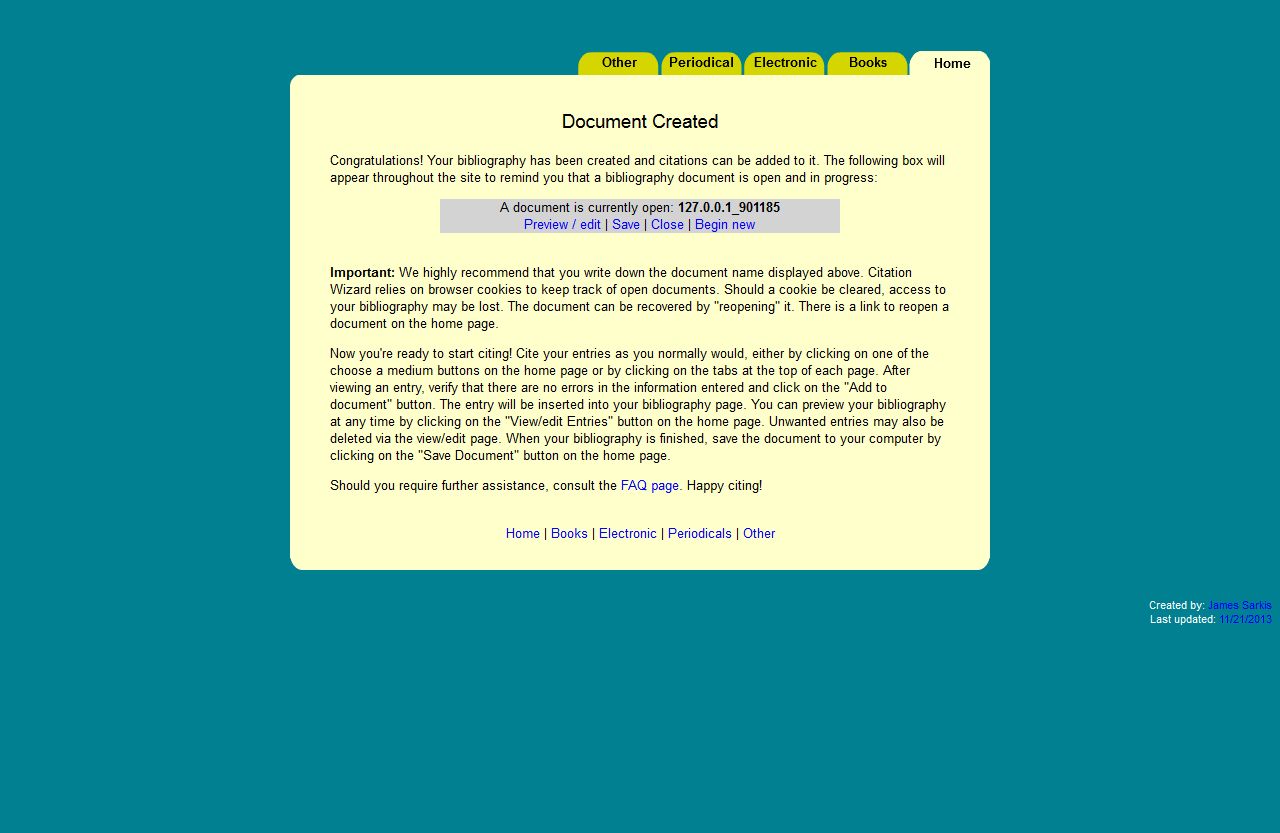
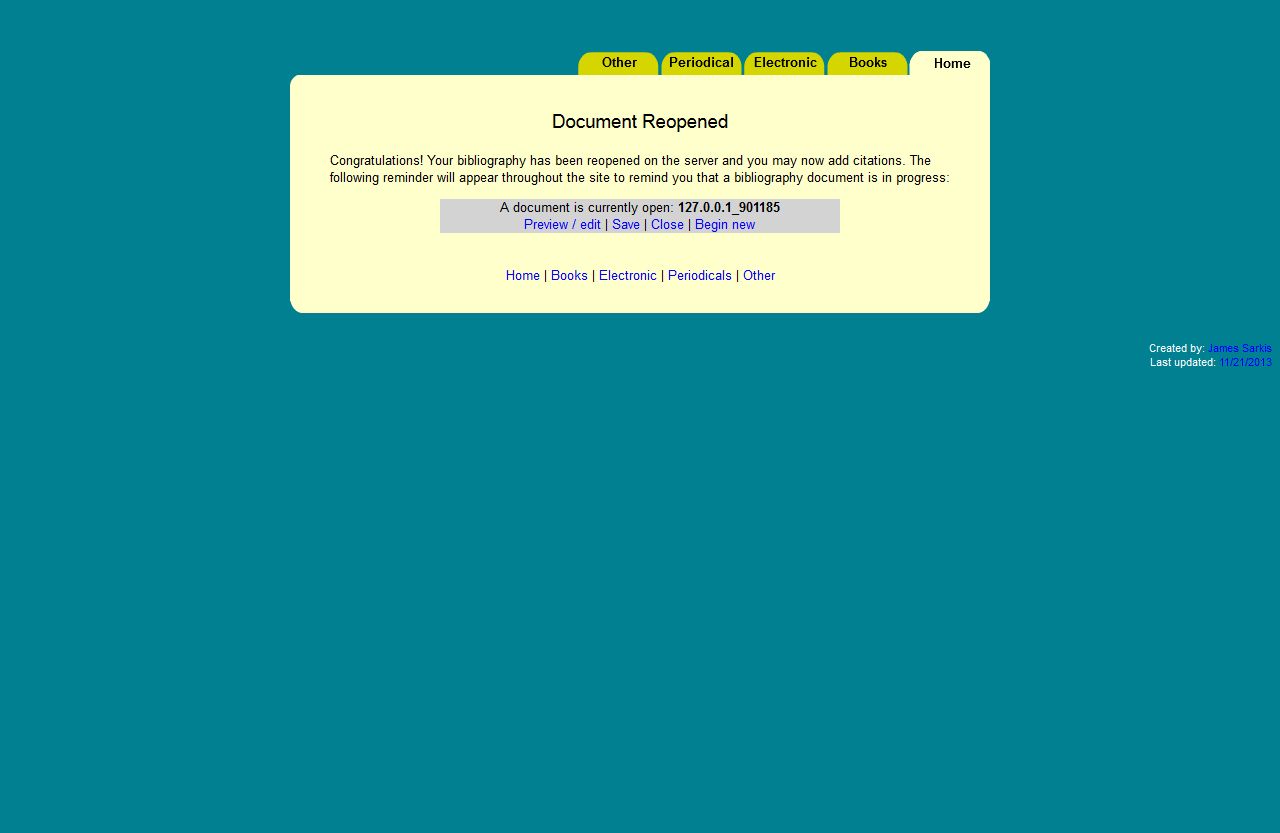
As long as your document is open, you'll see a notification inside a gray box on every page of the Citation Wizard. The gray box also contains useful links that allow you to preview and remove entries, save the document to your computer, close the document so other people can't make modifications to it, and to start a new one.
Step 1: To begin adding entries to your document, follow the normal steps involved with citing a work using the Citation Wizard. You will notice that a gray box will appear wherever you go letting you know that a document is open and available to have entries added to it.

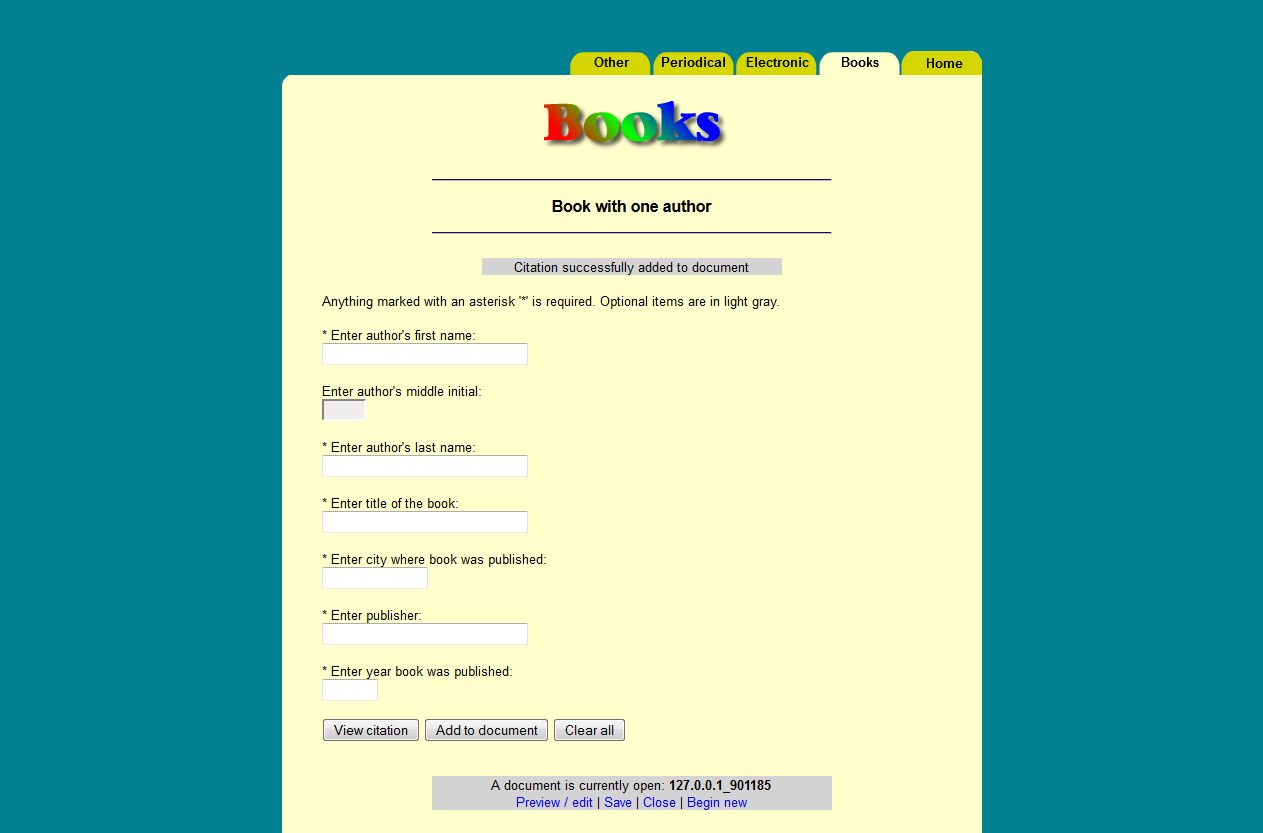
Step 2: Fill out the form as you normally would and click View Citation to verify that all the information you entered is correct and free of typographical errors. Next, instead of copy and pasting the entry into a word processor, you will click on the Add document button to add the entry to your bibliography or works cited document.
Step 3: A gray box will appear toward the top of the page that reads "Citation successfully added to the document." Repeat these steps for each work you want to cite.
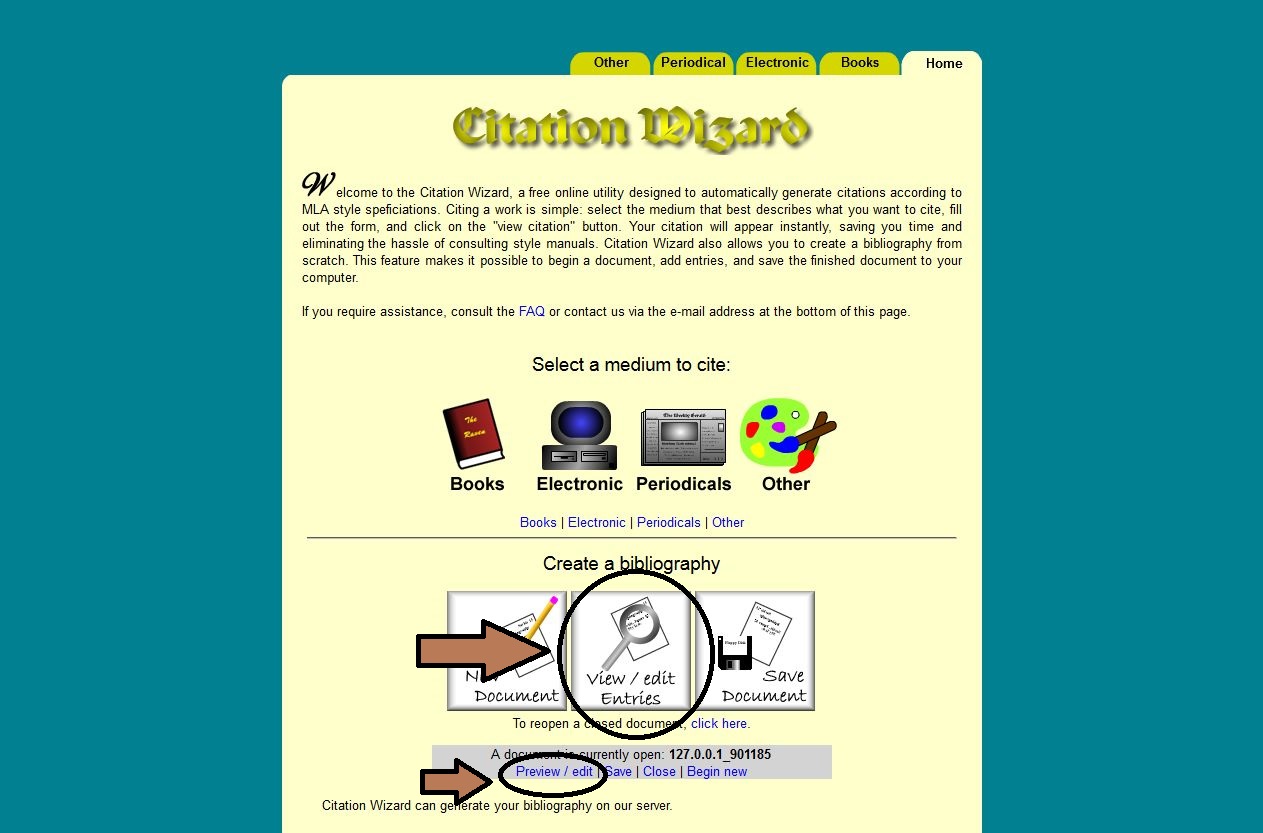
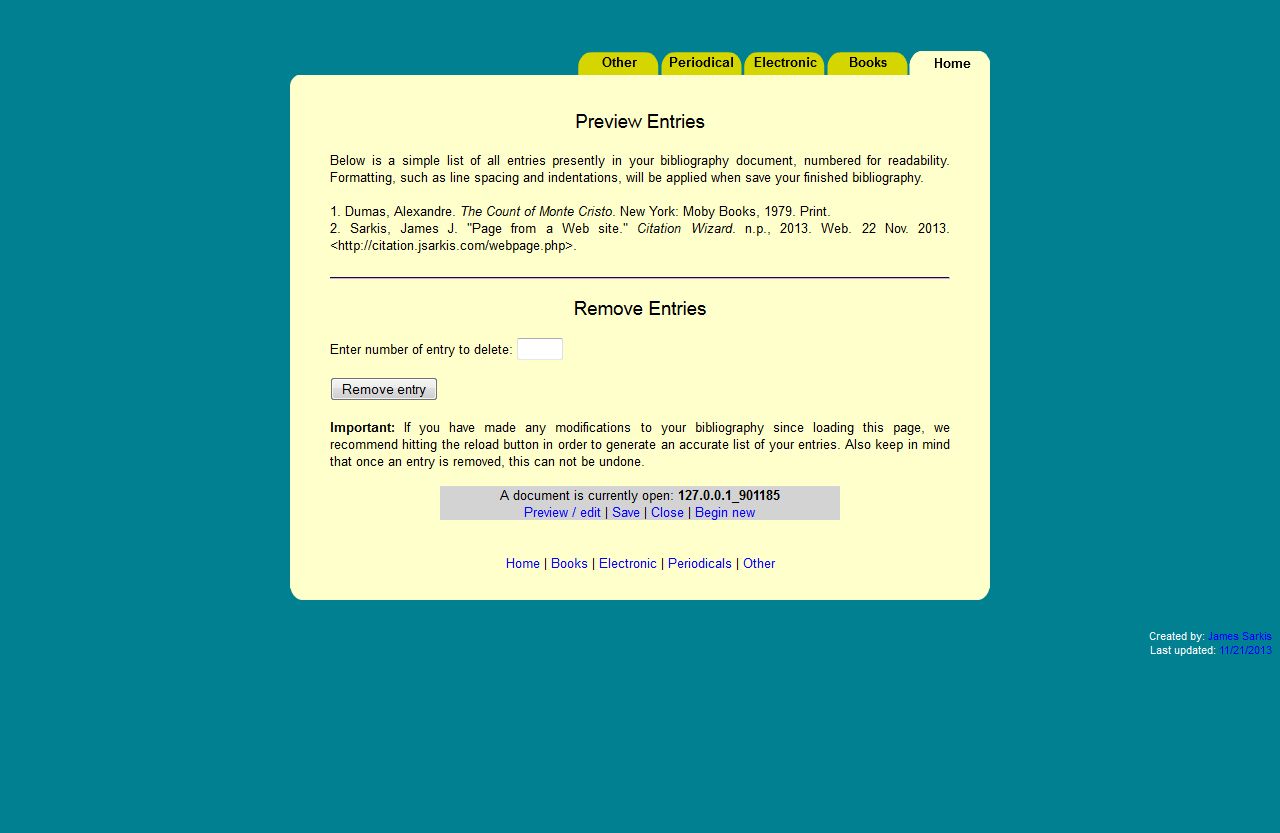
It's possible to preview the entries in your document, and remove those you don't need. To access this feature, click on Preview/edit in the gray box that appears when a document is open, or click on the View/edit Entries button on the home page.
You will see a page that lists all of the entries presently in your document, numbered for readability. These numbers will not appear in the finished document when you go to save.
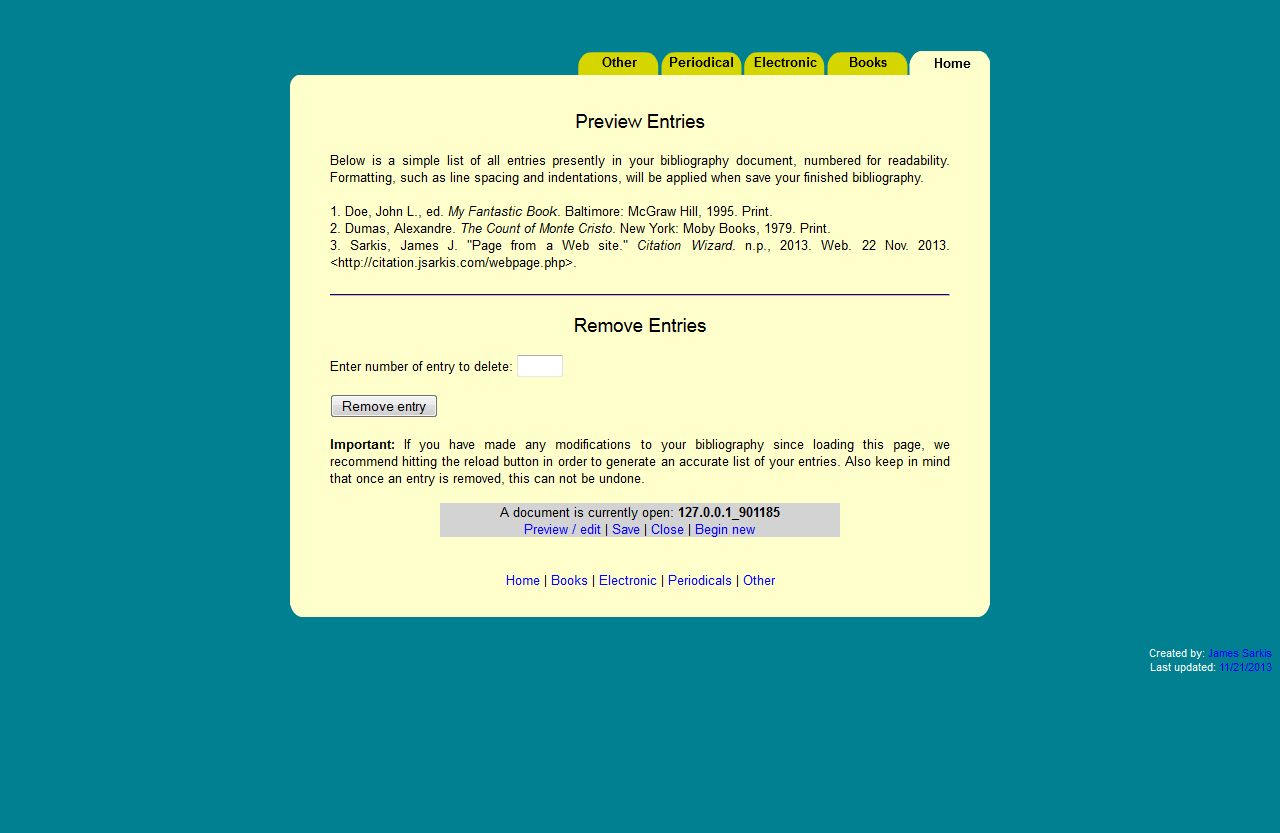
If you want to delete an entry, locate the number for the entry you wish to remove from your document, and enter it into the text box. Next, click on the Remove entry button.

The unwanted entry will be permanently removed from your document. This process may be repeated for however many entries you want to delete.
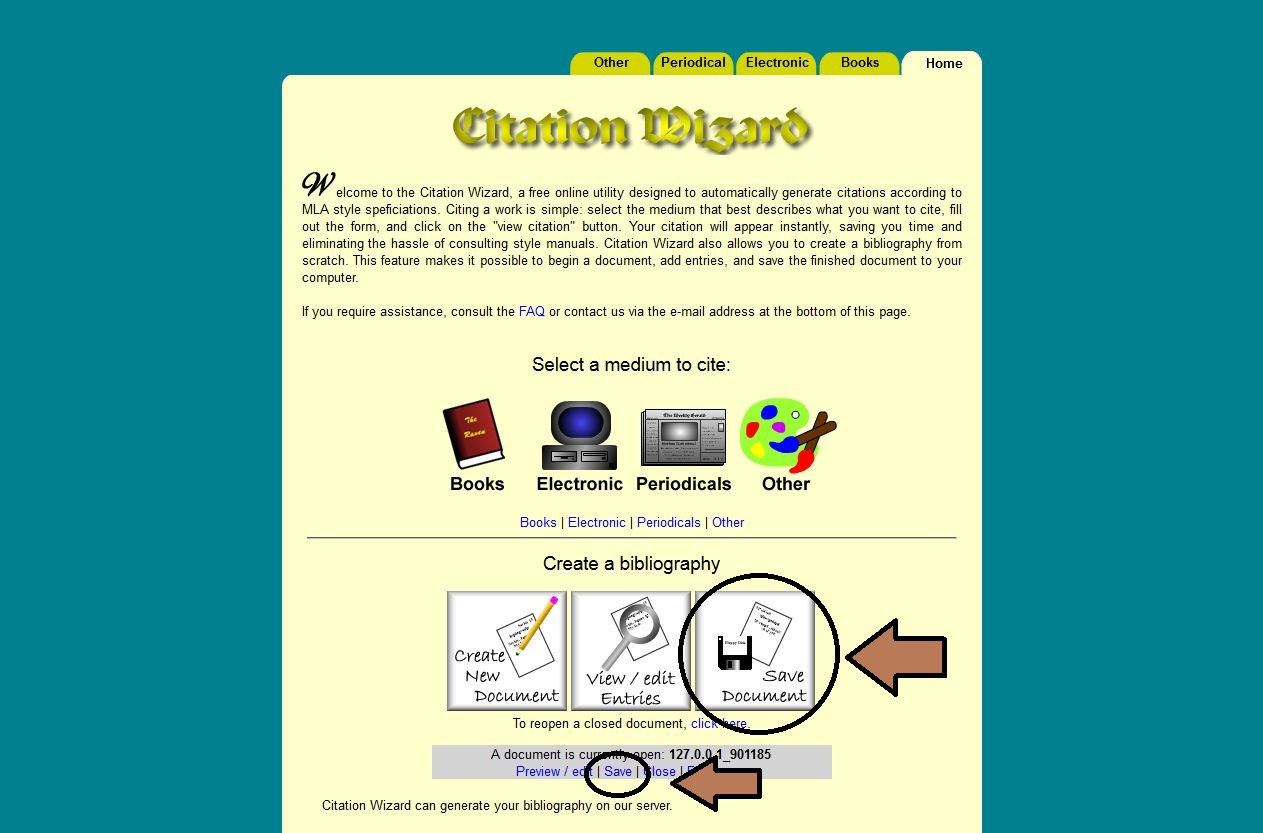
When you're ready to save the document to your computer, click on Save in the gray box that appears when a document is open, or click on the Save Document button on the home page.
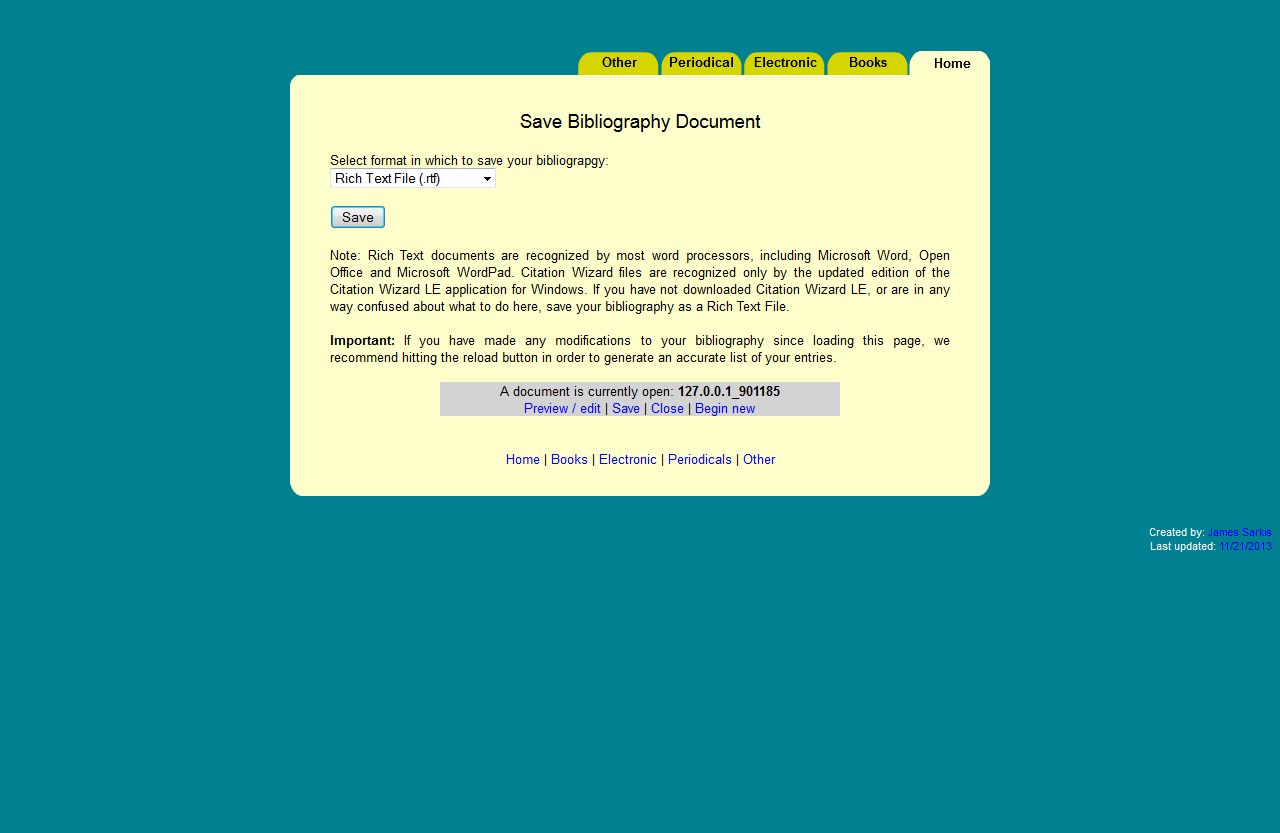
The save document page will appear. For most users, all you'll need to do is
click on the Save button to save your document as a Rich Text File (.rtf). If you have a copy of
the Citation Wizard LE desktop application, and would like to make future changes from there, choose
to save your document as a Citation Wizard (.cw) file and click Save.
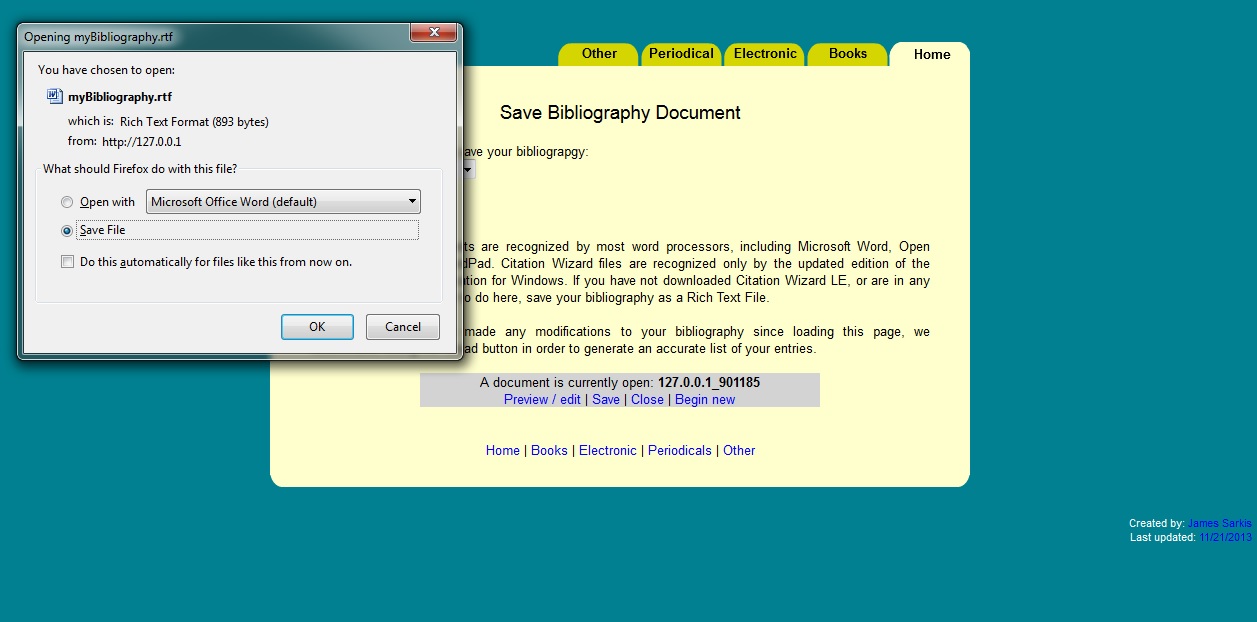
A file download will appear similar to the one below (this will vary depending on your browser). Choose where you want to save the file and click on Ok. Your document will be saved to your computer.
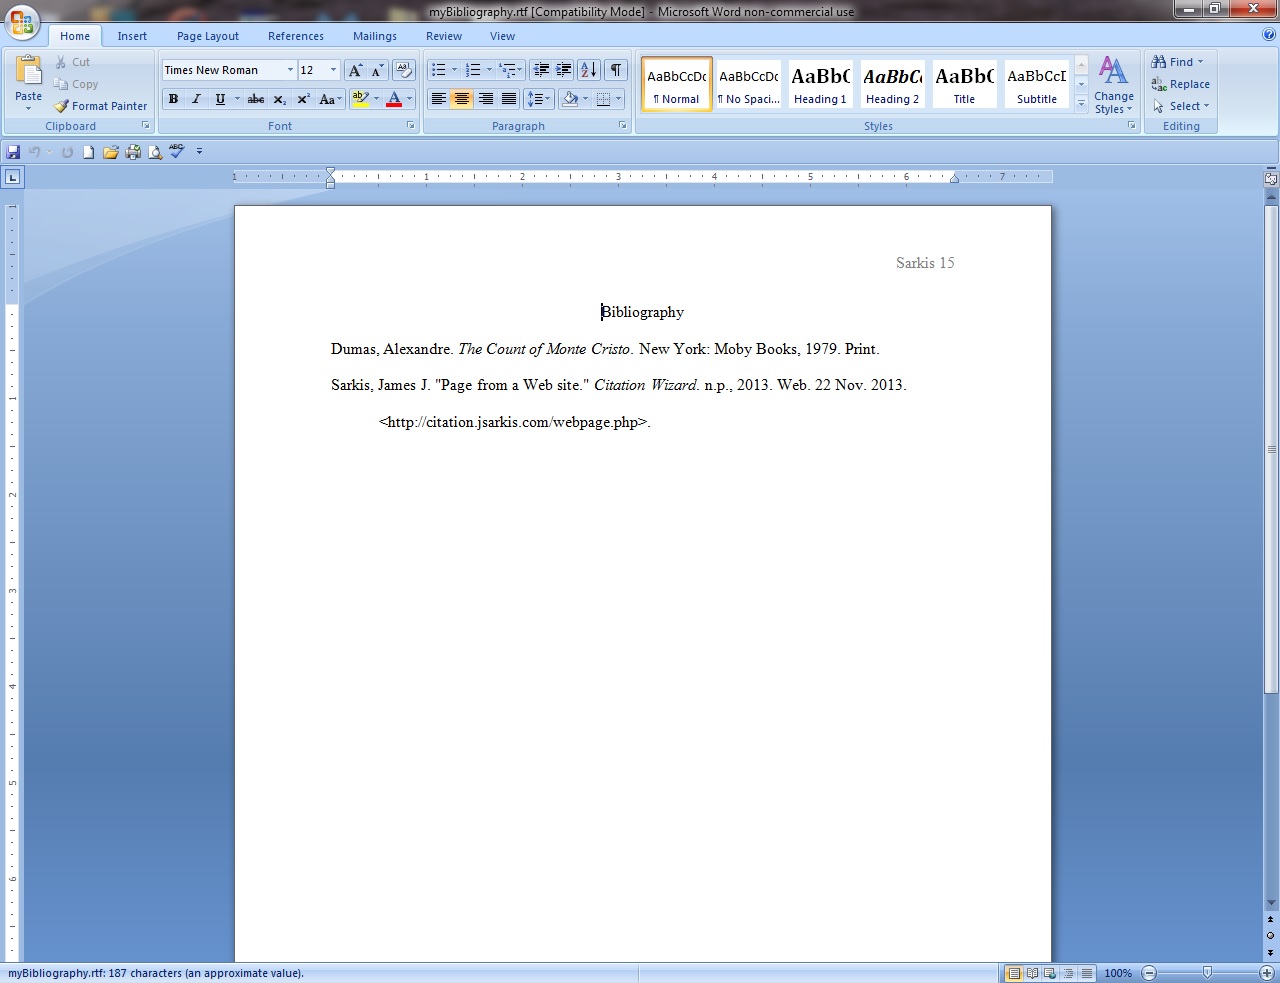
Open the saved document in your favorite word processor to see the finished result.
Your bibliography or works cited page is complete!
Closing a document will delete the cookie Citation Wizard created in your browser, thus severing the link with your document. This is useful in situations where you might be on a public computer and don't want another person to make malicious changes to your document. Don't worry - the document won't be deleted, just closed. You can reopen it later as long as you remember the document name (see why we told you to write this information down?). To close a document, click on Close in the gray box that appears when a document is open.

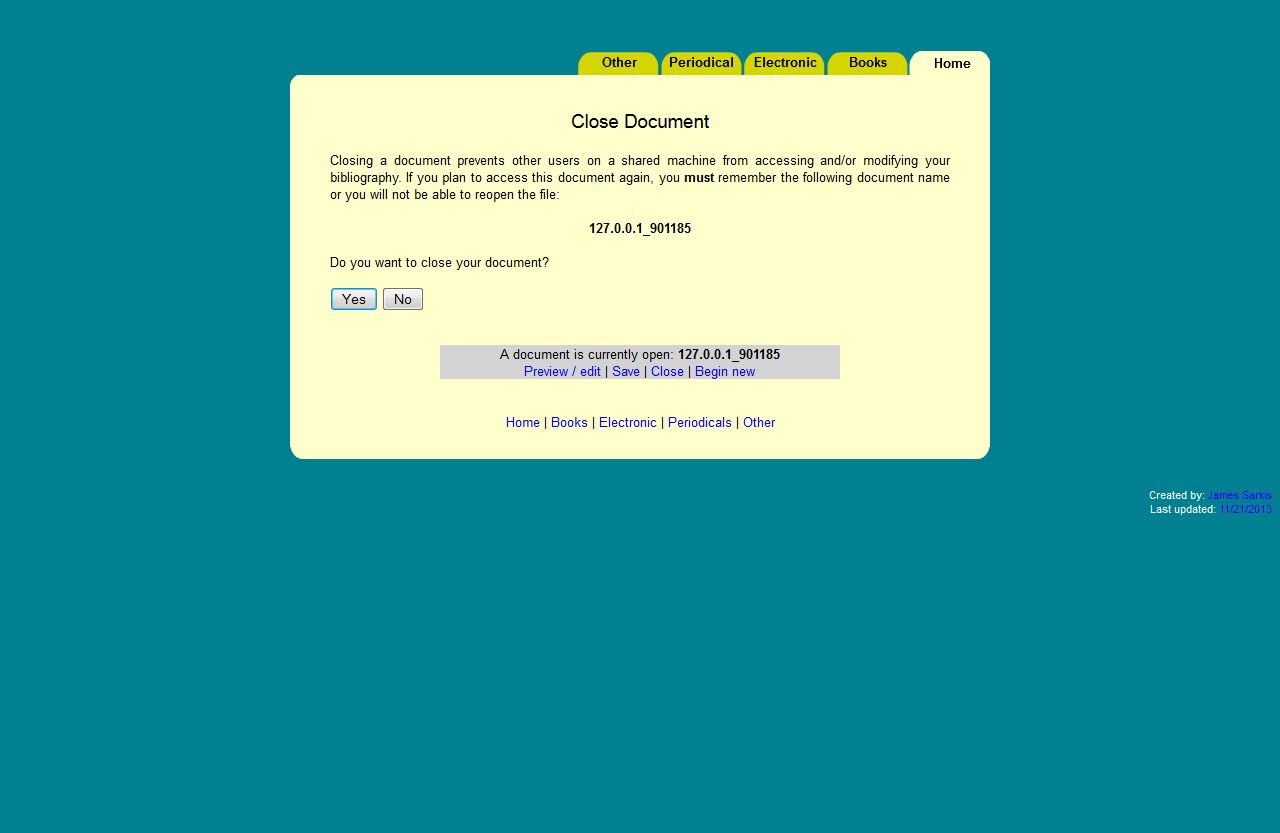
The close document page will appear. Again, if you wish to return to this document again, make sure to write down or otherwise remember the document name. When you're ready to close the document, click on the Yes button.
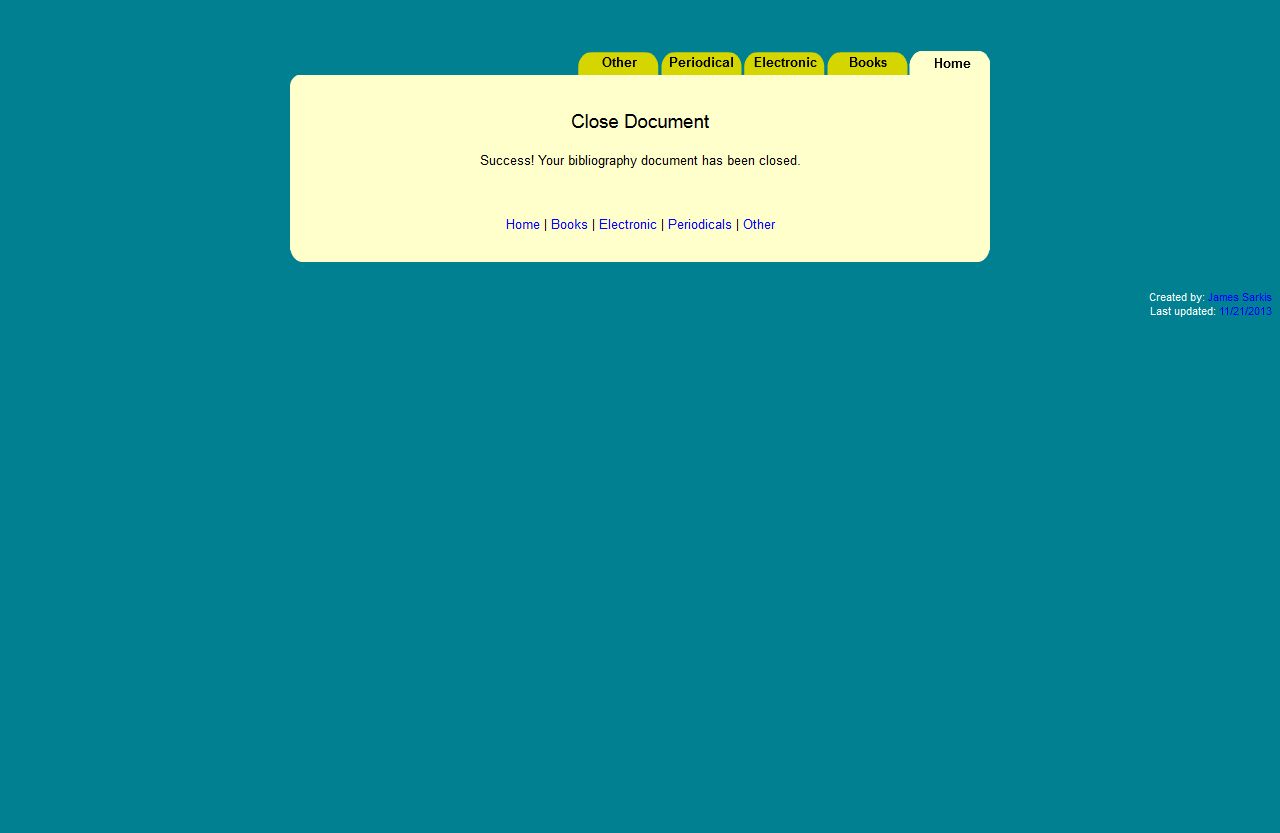
You will see the following confirmation when the document has successfully been closed. The gray document box will no longer appear on the Citation Wizard.
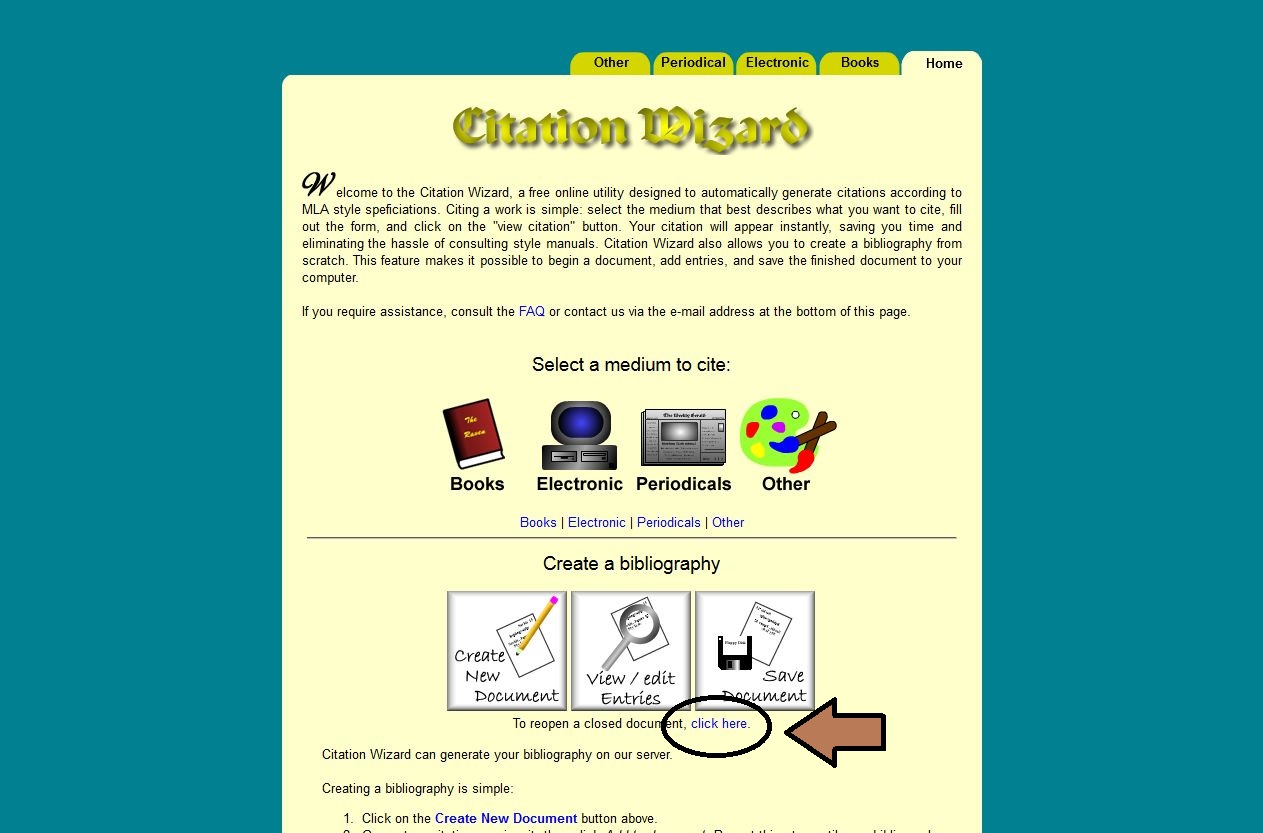
To reopen a closed document, click on the click here link below the three create a bibliography buttons on the home page.
The "reopen a closed document" page will appear as seen below:
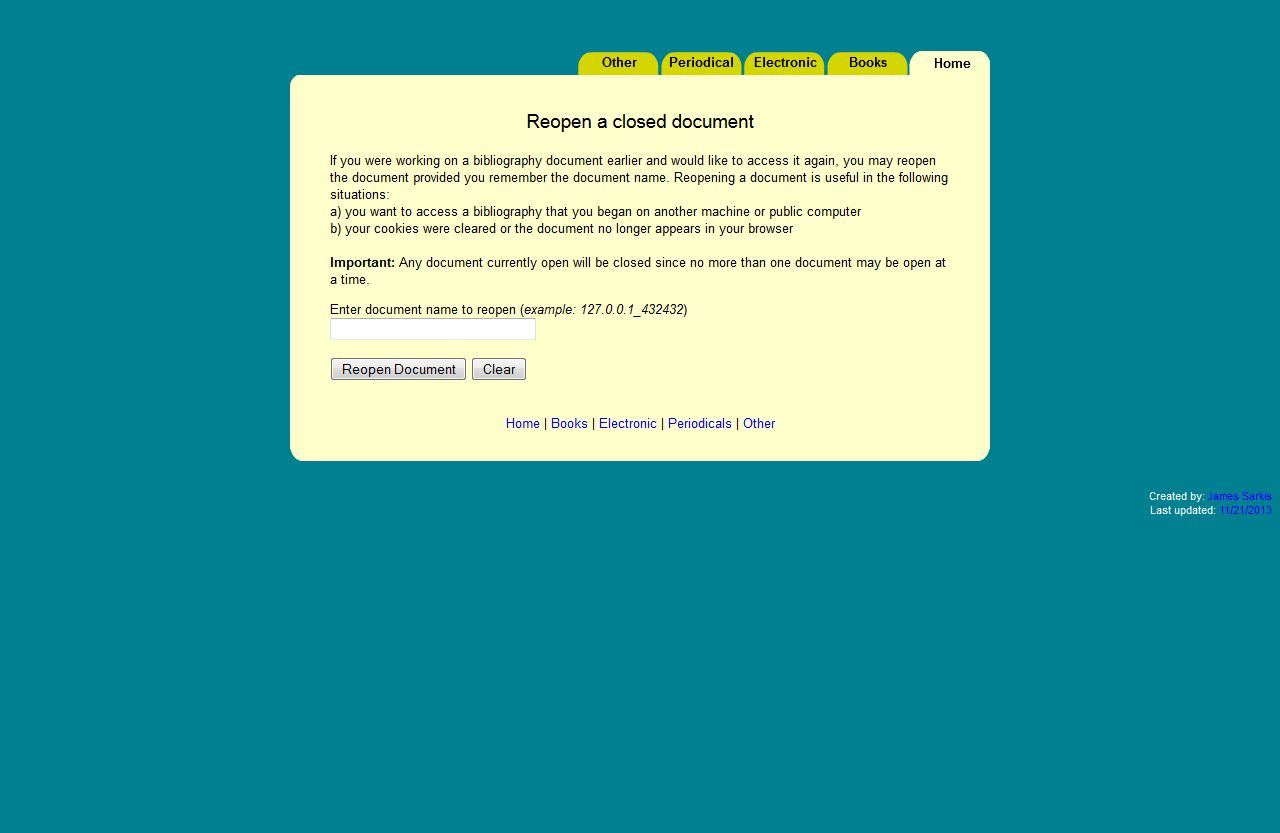
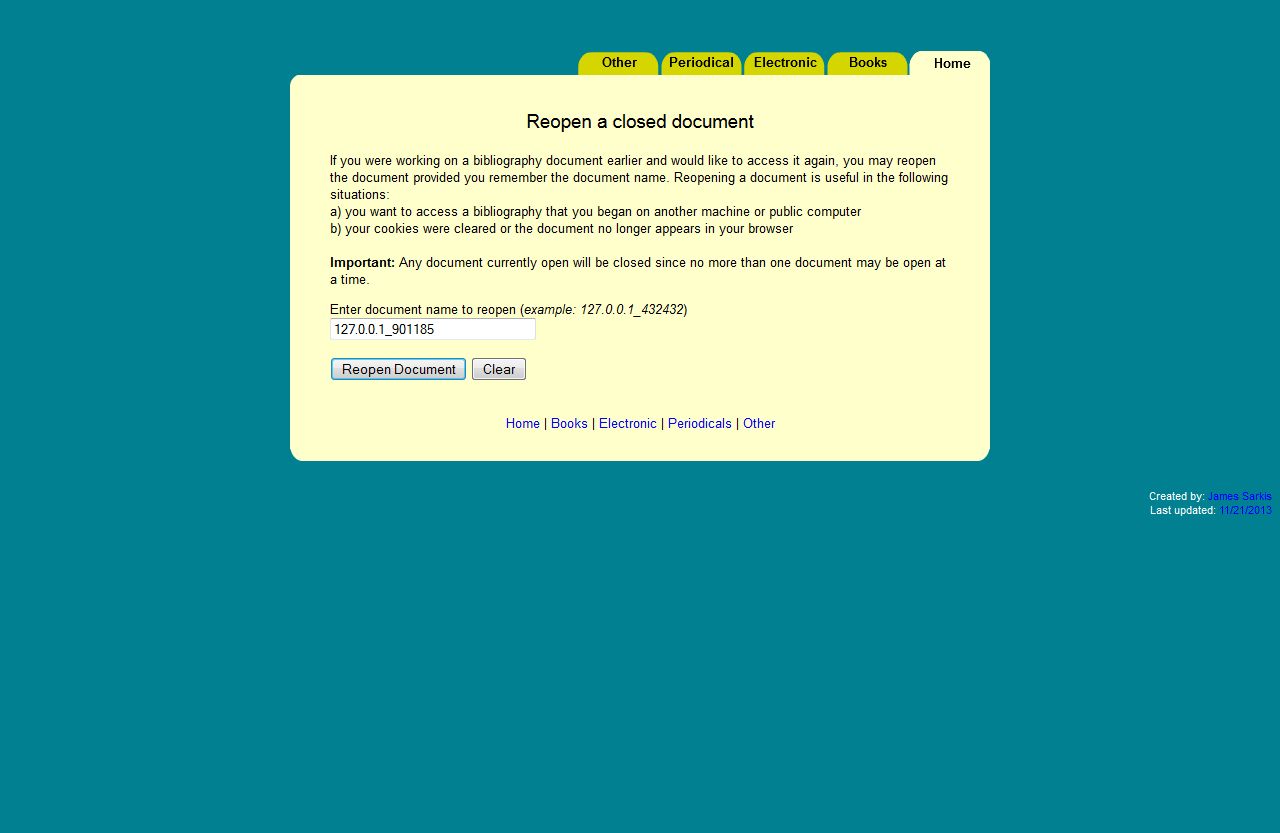
Enter the name of the document you wish to reopen and click on the Reopen Document button.
A notification will appear signaling that the document has been reopened. You may now continue to work with the document as you did before.